You need to learn this by tomorrow!
Table of content:
- Brew
- Render
- Remix (img2img)
- More (hiresfix)
- Edit
- Showprompt
- Inpaint
- Outpaint
- Controlnet
- Facelift
- Faceswap
- Other commands
In this article, you will find all commands for our telegram bot with almost every possible setting they can be used with. There’s a lot! But remember that most of those settings are optional and can be safely skipped in which case the bot will randomly pick one of the safe options.
The settings are color coded:
- black (white if night mode is on) – essential, won’t work without this
- orange – important, should be included for better control/results
- blue – optional, add if you want to try various options
- green – safe to omit, for expert detail-oriented users only
Changelog:
- Version 0.90 – might still be missing a command or two
- Version 0.91 – added /parser:new option to /more (point 4)
1. Brew
/brew fireflies at night, serene lake of lava
/brew – a fun command. It doesn’t need any other settings as it automatically and semi-randomly adds various elements to your prompt. Notice that this may lead to entirely different results than intended. Every setting used with render (size, model, etc) can also be used with brew – they will overwrite their random counterparts.
2. Render
/render /parser:new /clipskip:2 /size:512x768 /sampler:dpm2m /steps:35 /guidance:7 /seed:123 /images:4 #fantasy fireflies at (night), serene lake of (magma:1.4), [lowres, blurry, (worst quality:1.4)] <background-tweak:0.3> <masterpiece:0.4> <paragon>
/render – the most used command, won’t add any elements by itself.
/parser:new – enables the usage of weighted prompts like (magma:1.4) and clipskip.
/clipskip:1-13 – an advanced option, click on it for more information. It will only work together with parser:new. Works best at values 1, 2 or 3. The default is 1.
/size:512×768 – sizes that produce good results are 512×768 and 640×832 for portraits, 768×512 and 1024×576 for scenery. Important – the bigger the size the longer it takes to render and the more likely the results will be broken.
Extra size commands: /size:tall /size:wide /size:portrait /size:landscape
/sampler:dpm2m – responsible for denoising. You can use: ddim (fast), dpm2m (good for anime), k_euler_a (vastly different results), k_euler, upms. Type /samplers in your bot for a reminder list.
/steps:1-100 – number of denoising steps a sampler makes. The default value is 50 which is super high. Most examples on civitai use 25-30 steps. Sometimes it’s good to manually lower this number to ~25-35 in order to achieve more unique results. Using more than 50 may require you to lower the number of images generated at once.
Extra steps commands: /steps:wayless /steps:less /steps:normal /steps:more /steps:waymore
/guidance:1-50 – also known as CFG. It tells the AI how closely it should stick to your prompts; the higher the more. A golden number that always works is 7. By default the system will pick a random value from 5 to 15 for every picture. Allowing it to do so is good when you want to grasp how guidance affects different models. Going over 20 is rarely a good choice.
/seed:123 – locking a seed and rendering the same prompt again will result in almost identical results (other settings must also be locked!). Good for checking how a single prompt affects the results, to slightly alter a picture you like, or making comparisons.
/images:4 – number of images generated in each batch. Maximum is 9, default is 5. If the system tells you that your request would take too long (or runs out of memory while rendering), this is the first value that should be lowered.
#fantasy – one of the available recipes. Completely optional but may be used to shorten the long quality prompts you’re going to add anyway into a single word. You can browse (and make your own) recipes here.
fireflies at (night), serene lake of (magma:1.4) – positive prompts used. Putting prompts in parentheses like (night) is the old way of adding more emphasis (weight) on a certain prompt. Using it like this (magma:1.4) is the new way that allows for more precise control but works only with /parser:new.
IMPORTANT! – Crossing weight:2 for even a single prompt will almost certainly decrease the quality. Even if you have weight:1.8, but use a recipe that adds ((( ))) around your prompts (they all do this) the overall value will cross 2 since their effects are cumulative.
Don’t increase prompt weight over 1.5-1.6 if you use a recipe.
[lowres, blurry, (worst quality:1.4)] – negative prompts used. It’s important to use brackets to open and close their section, but adding numerical weight requires parentheses, just like in this example.
<background-tweak:0.3> <masterpiece:0.4> – mini models (loras) added to the prompt. There’s no upper limit to them, but it’s hard to get more than three at once to work properly. They require a lot of tweaking with their weight for best results. Some work only with a weight as low as 0.01.
<paragon> – full model (concept) used by the recipe. The main ingredient that will have the most effect on the outcome. It has no weights, and only one is used while rendering.
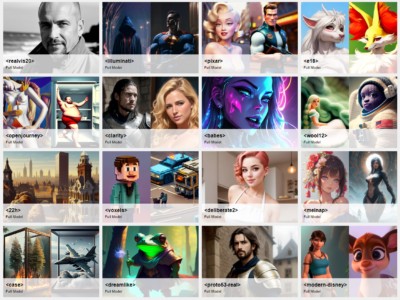
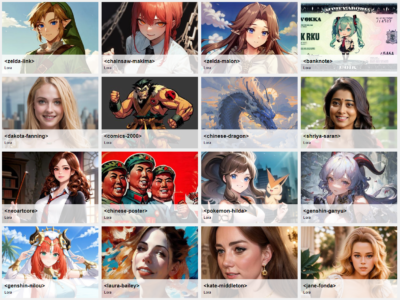
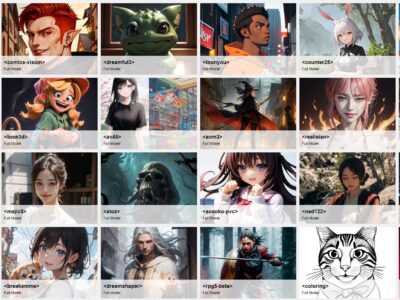
You can check what loras and full models we have here. The droplist on the right allows for easy segregation of loras and full models. It’s also possible to view them in telegram, type /concepts in your private bot.
3. Remix (img2img)
Reply to a picture with this command
/remix /strength:0.4 /parser:new /clipskip:2 /size:832x1024 /sampler:dpm2m /steps:40 /guidance:12 /seed:123 /images:4 #fantasy blue butteflies at (night), erupting volcano, (magma:1.4), [lowres, blurry, (worst quality:1.4), grass] <gem-punk:0.3> <masterpiece:0.4> <believe>
/remix –a great way of slowly changing the picture into what you want, or to whack it upon the head and change entirely. It can be used simply as “/remix red hair”, but since it doesn’t inherit any of the original prompts or settings, this will cause the results to default to 512×512 and remove all models used (usually ends badly).
/strength:0.4 – this setting controls how much the picture is allowed to change. 0.1-0.3 will cause only minor changes, 0.4-0.6 will influence the results more, but it should still be recognizable as the original, and 0.7+ will likely result in a new picture.
/size:832×1024 – since remix uses the original picture as the base, it’s also capable of increasing its size and quality without changing the art style.
/guidance:12 – while remixing, it may be a good idea to bump the guidance a notch (12-16), especially if you’re trying to introduce new prompts and change details.
<gem-punk:0.3> <masterpiece:0.4> – it’s possible to introduce new loras into the picture with the remix command, the ones tagged as “detailers” in our concept viewer are best for this job.
<believe> – changing the base model while remixing can alter the picture style without changing its content. This may be used to turn anime into realistic photos and vice versa.
blue butterflies at (night), erupting volcano, (magma:1.4), [lowres, blurry, (worst quality:1.4), grass] – remix allows to change the prompts as you see fit. You can include new ones or remove the old. If you’re copying the entire prompt used to make the original, it’s important to place any new prompts at the beginning so they can influence the outcome without raising /strength above 0.5.
#fantasy – while it’s possible to add recipes and styles to remix, this will most likely result in unpredictable outcomes and sometimes interferes with other settings.
The rest – works the same as in normal render.
TIP: /remix is a good alternative to /more if you want to increase the quality and size of the picture without affecting its art style and content too much. This requires copying the entire prompt and settings (seed, sampler, models, etc) used to make the original picture into the remix command.
EXPERT LEVEL – you can use controlnet together with /remix.
4. More (hiresfix)
Reply to a picture with this command
/more /strength:0.45 /parser:new /clipskip:2 /size:1200x1200 /sampler:dpm2m /steps:40 /guidance:10 /seed:123 /images:3 <gem-punk:0.3> <masterpiece:0.4> <believe>
/more – unlike remix, more will inherit all prompts and models, but not size and other settings. Those have to be set manually. More is a good way to enhance smaller pictures into bigger resolution while simultaneously improving quality, it can also be used to make variations of a picture you like. The effect of /more may vary depending on the prompts used, as it strengthens them.
/parser:new /clipskip:2 – if you used this in your original render, then it might be a good idea to include it in /more as well. Otherwise your prompt weights and clipskip will be ignored.
IMPORTANT – you can’t add or remove prompts with /more, they will be inherited from the original.
/strength:0.45 – in case of /more, you may skip /strength and let the AI decide. Still, I found that ~0.45 is good for anime, and ~0.35 for realistic renders.
/size:1200×1200 – a good size to drastically increase quality. It will automatically adjust to your picture size ratio, so there’s no need to think hard about exact numbers. However, if your render is below 640×640 then it’s better to first use 1024×1024 before going bigger.
/images:3 – if you’re using /more with sizes bigger than 1024×1024 then it may be necessary to lower the number of images or the bot will scold you.
/guidance:10 – while using /more, guidance is also important. ~8-10 is suitable for realism, while ~10-14 for anime. Lower values will smoothen out the picture while higher will make it more detailed and ‘rigid’.
<gem-punk:0.3> <masterpiece:0.4> <believe> – if you don’t specify any loras and models then /more will reuse the ones from the original picture. However, if you add even a single model or lora then the original ones won’t be inherited.
NOVICE LEVEL – simply use /highdef while replying to a picture to obtain better quality and size. It works like more, but all settings are automatically chosen.
EXPERT LEVEL – you can use controlnet together with /more.
5. Edit
Reply to a picture with this command
/edit /strength:0.45 /size:512x768 /sampler:dpm2m /steps:40 /guidance:10 /seed:123 /images:3 add fireworks to the sky
/edit – works like remix, but has its own model and doesn’t allow any others to be used with it (it will ignore them). It’s rather random and unpredictable.
/strength:0.45 /size:512×768 – only those settings that should be considered while using /edit. The rest is optional.
6. Showprompt
Reply to a picture with this command
/showprompt /history
/showprompt – a simple command that shows an immense amount of information about each render including its seed, prompts used etc. Very useful and required for obtaining short codes.
/history – add this part if normal showprompt shows only the last operation made on a given picture (usually facelift). Remember that it has some limitations and may not always work.
7. Inpaint
Reply to a picture with this command
/inpaint /strength:1 /size:512x768 /sampler:dpm2m /steps:35 /guidance:7 /seed:123 /images:4 #fantasy fireflies at (night), serene lake of (magma:1.4), [lowres, blurry, (worst quality:1.4)]
/inpaint – vast topic, click on its name for more info. Here’s a tutorial about removing clothes from uploaded pictures.
/strength:1 – decreasing the inpainting strength will result in some of the original picture mixing with the applied changes. This can be used to change the subject but retain the pose.
/size:512×768 – inpaint will inherit the original picture size, which is usually the best option, but it’s also possible to manually set it.
/sampler:dpm2m /steps:35 /guidance:7 /seed:123 /images:4 #fantasy – all of those options work with inpaint, just like in /render.
[lowres, blurry, (worst quality:1.4)] – remember to move the negative prompts into their own box in the inpaint window.
7.1 Inpaint extra options
Reply to a mask (the black and white picture) generated with normal inpaint with /showprompt, it will give you this information:
or reuse this mask for inpaint:
/inpaint /mask:IAKdybW Old Man
Reply to a picture with this command
/inpaint /mask:IAKdybW /maskinvert /strength:1 /sampler:dpm2m /steps:35 /guidance:7 /seed:423 /images:4 #fantasy fireballs at (night), serene lake of (flowers:1.4), [lowres, blurry, (worst quality:1.4)] <believe-inpainting>
/inpaint /mask:IAKdybW – allows to reuse the inpaint mask without the need to draw it again. Perfect for making multiple inpaint attempts on the same picture.
<believe-inpainting> – without the browse window to pick inpainting model it has to be added manually. You can check what models are available with /concept /inpainting
/maskinvert – inverts the inpainting mask.
TIP: Size will be inherited from the original picture.
8. Outpaint
Reply to a picture with this command
/outpaint /maskinvert /side:top /blur:10 /zoom:2 /contract:10 /strength:1 /size:512x768 /sampler:dpm2m /steps:35 /guidance:7 /seed:123 /images:4 fireflies at (night), serene lake of (magma:1.4), [lowres, blurry, (worst quality:1.4)] <believe-inpainting>
/outpaint – expands the picture using the same rules as inpaint.
/side:bottom/top/left/right – you can specify a direction to expand your picture or go in all four at once if you don’t add this command.
/blur:1-100 – blurs the edge between the original area and the newly added one.
/zoom:1-12 – affects the scale of the whole picture, by default it’s set to 4.
/contract:0-256 – makes the original area smaller in comparison to the outpainted one. By default, it’s set to 64.
<believe-inpainting> – outpainting uses the same models as inpaint, it has to be added manually to your prompt. You can check what models are available with /concept /inpainting
TIP: For better results, change your prompts for each use of outpaint and include only the things you want to see in the newly expanded area. Copying original prompts may not always work as intended.
9. Controlnet
/control /new:name – reply to a picture with this command to create a new controlnet preset.
/control – show all presets in a given community.
/control /delete:name – deletes a preset with this name.
/control /show:name – show the picture used as this preset.
You can also use /showprompt on a picture, (if it was uploaded from outside source use /facelift /photo /size:832×832 on it first) it will give you a short code to use without having to make a controlnet preset:
use this image with controlnet (ex. with edges):

/render /edges:IOGp4VN an old man
/render /edges:IOGp4VN /mask /controlguidance:0.7 /parser:new /clipskip:2 /size:832x832 /sampler:dpm2m /steps:40 /guidance:7 /seed:123 /images:4 #fantasy fireflies at (night), serene lake of (magma:1.4), [lowres, blurry, (worst quality:1.4)] <background-tweak:0.3> <masterpiece:0.4> <paragon>
- /edges — best for objects and obscured poses, where it creates a line drawing of the subject, like a coloring book, and fills that in.
- /pose — best for people whose joints are clearly defined, but you want to completely discard the original photo’s finer details. Just the pose.
- /skeleton — upload the ControlNet-extracted mask from a pose, and render from that skeleton’s pose. Can only be used as an input here.
- /contours — an alternative, fine-focused version of edges. This one and edges retains the most resemblance to the preset image.
- /depth – as the name implies, creates a 3D depth mask to render into.
- /segment – detects standalone objects in the image.
- /reference – attempts to copy the abstract visual style from a reference image into the final image (with an introduction to preprocessors).
Reference is hard to control and requires fine tuning with those three extra commands: /refadain:true or false /refattn:true or false /refguess:true or false
/mask – shows a controlnet mask together with the results – useful.
/controlguidance:0.1-2 – controls how much the render should stick to a given controlnet mode. Values between 0.1-0.5 give it a lot of freedom, while crossing 1 will usually make the results too ‘controlled’.
/size:832×832 – using the same size as the control picture will produce better results.
The rest – works the same as in normal render.
10. Facelift
Reply to a picture with this command
/facelift /strength:1 /photo /size:1600x1600
/facelift – fixes face (glitches, imperfections, rough and oily skin) as well as upscales your picture.
/facelift /anime – gives extra sharpness and removes some blurriness. It works great on drawings, paintings, CGI, including semi-realistic CGI. Doesn’t touch faces.
/facelift /photo – same as a normal facelift but doesn’t touch faces.
/strength:1 – controls the strength of face retouch of /facelift.
/size:1600×1600 – you can manually set the size for facelift (even decrease it if needed). Size ratio will be automatically adjusted.
11. Faceswap
For faceswap you will need to either make a new control preset with a picture containing the face you like (explained in point 9) or use /showprompt on one to receive the shortcode:
or swap this face onto image, by replying to a render with:
/faceswap IOGpkbp
Reply to a picture with this command
/faceswap IOGpkbp /strength:1
/faceswap – swaps one face with another. Doesn’t work well with anime as it fails to detect a face most of the time.
/strength:0.1-1 – affects the strength of faceswap.
12. Other commands
While replying to a picture:
/highdef – just like /more but with carefully prepared settings. Easier and faster to use.
/download – downloads the picture directly from the server omitting telegram’s compression.
/refine – transfer prompts used to make a picture from telegram to web ui.
/delete – permanently deletes the picture both from telegram and web ui.
/meme your text – makes a meme out of the picture.
Directly in telegram:
/webui – works only in your private channel, sends a login link to your web ui.
/archive – works only in your private channel, sends a login link to your web ui archive.
/cancel – cancels your render queue. However, if something is already being rendered, it won’t be stopped.
/projects – shows all your projects. More details are explained upon using this command.
/concepts – show all available concepts.
/concepts /show:name – shows the details of a given concept (a lot have useful tips in descriptions).
/settings – a handful of useful settings for your account. The usage is explained for each after using this command.
/recipe:fuji – the old way of using recipes, still works.
#fuji – a new way of using recipes. You can make your own recipe here.
/recipes – lists out all available recipes.
/styles – just like recipes but they aren’t global and will work only in one community. More details are available after using this command.
/history – gives you a list of your recent renders, can also be used to search for specific keywords for example: “/history dog“.
/help – if you’re stuck give it a try. Mostly used to test if the bot’s working.
/suggest abc – send your suggestion for improvements directly to the admins. You can also take a look here and vote for future updates.
/gallery – enables your gallery.
/email [email protected] – use it to set a new e-mail for your community
/usernamer name – use it to change your usernamer.
/community /password:ABC1234 – set up a new password for your community.
Author: Trako


